Blow It Out Your Roof: a Guide to Replacing a Bathroom Fan!
2 Materials
2 Hours
Medium
They say nothing is certain but death and taxes, but I'd like to add a third: repairs! Last week alone, three things broke down on us that had to be repaired. When you're a do-it-your-selfer and a blogger, you have to look on the bright side of things and call that a good week: repairs alone can give you a ton of things to write about!
This week, I'm sharing a DIY on how to replace a bathroom fan.
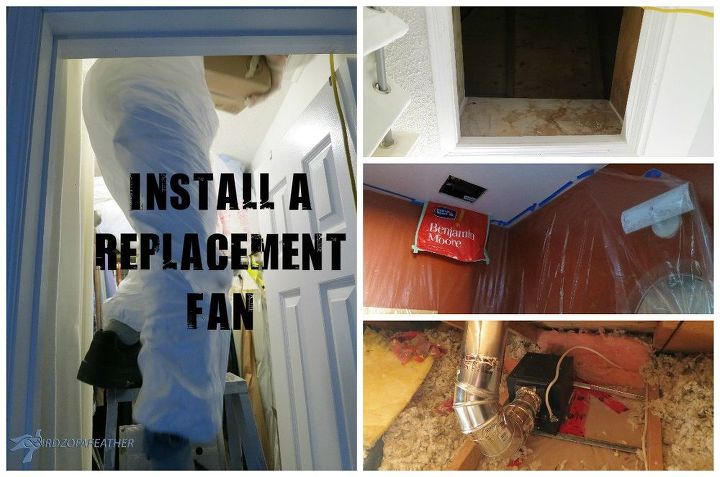
As (bad) luck would have it, our bathroom fan stopped working just before the hottest and most humid blast of weather hit us. Poor hubs had to go up into the attic to replace the fan and was just drenched when he was done. Ironically, that was the same morning that our air conditioner broke down, so by the afternoon our house was as hot as the attic! Oh well, I guess our pain is your gain.
I wasn't sorry to see the old fan go. It was so loud and clunky, I could hear barely hear hubs singing rubber ducky outside the bathroom door 
Personally, I would never want to attempt such a dirty, grimy job myself, but hubs is a perfectionist and he likes things done right. For instance, he planned to seal and insulate all the duct work. When you hire a contractor, they're in and out so fast that it leaves you wondering if they sealed it up as thoroughly - if at all! Sometimes contractors take shortcuts and don't even bother to connect the bathroom fan to the roof vent. This is a HUGE problem as mold will grow unless the fan is vented properly through the roof.
To start, hubs removed the old fan so he could find a replacement that would fit without having to cut a bigger hole into our drywall. He taped a plastic bag to the ceiling so he could cover up the hole after removing it (wouldn't want any critters - or insulation - to fall into the bathroom, would we?).
He also protected all the surfaces in the bathroom by taping plastic to the walls and on the floor to catch any insulation/mess that might drop down when he was working in the attic later.

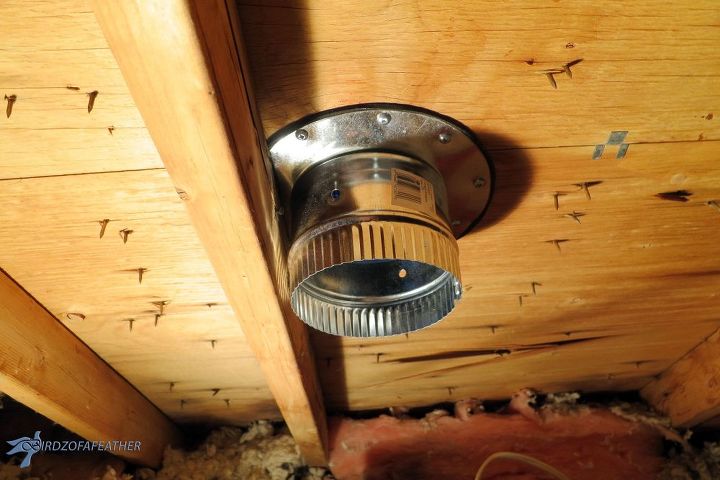
Hubs then inspected the condition of the old ducting in the attic. He discovered that the original 4" pipe attached to the vent was poorly installed and there were a lot of gaps. He also discovered that the builder cut too big a hole into the roof - which further explained the gaps. Here's what the old duct (and fan) looked like:
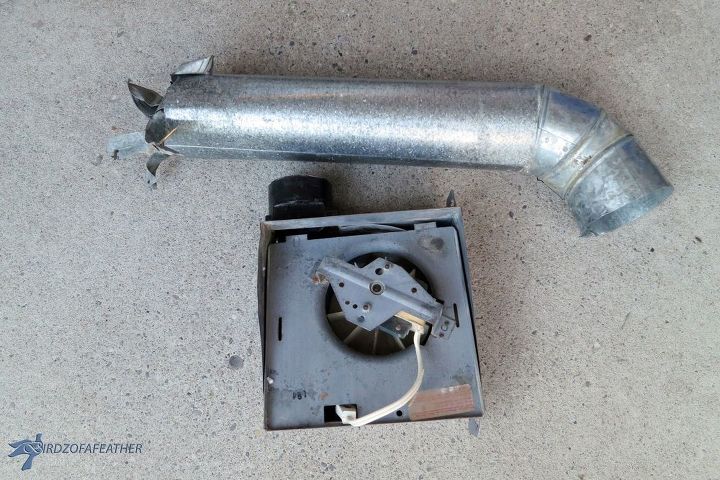
Because of the gaping hole in the roof made by our builder, hubs was going to have to use a 5" gasket in order to bridge the gaps at the roof vent and then replace our 4" ductwork with 5" fittings instead.
Hubs found a specialty fan store that sells to the building industry, but is open to the public. He took the old fan with him. It cost him $75 for a new whisper quiet fan (only 1 sone). Any fan under 1.5 sones is considered to be quiet so keep that in mind when shopping. Another thing to keep in mind is the diameter of the duct connector on the new housing. To maximize performance, try to match your duct diameter to the new fan. As I mentioned, ours was duct was originally 4" wide but we needed 5" to span the gap at the roof so hubs decided to buy a duct reducer (installing the 4" end onto the fan and the 5" end onto the new ductwork). There's nothing wrong with increasing the size of the ductwork, but don't ever do the opposite or you will restrict the exhaust from the fan!
With respect to performance, a fan's ability to move air is measured in cubic feet per minute (CFM), so look for a CFM rating that will meet your needs by moving enough air for the size of your bathroom. To determine your CFM rating, use the following formula:
Length x width x height x .13 = the minimum CFM rating
In addition to the fan, hubs purchased a variety of new fittings too. Get more than you think you need and return what you don't use; there's nothing worse than being stuck in the attic and then realizing that you have to run out to buy something you didn't get!. All-in, it cost about $125 for the fan and supplies. It would cost you up to a couple hundred dollars more than that to have someone install it for you.
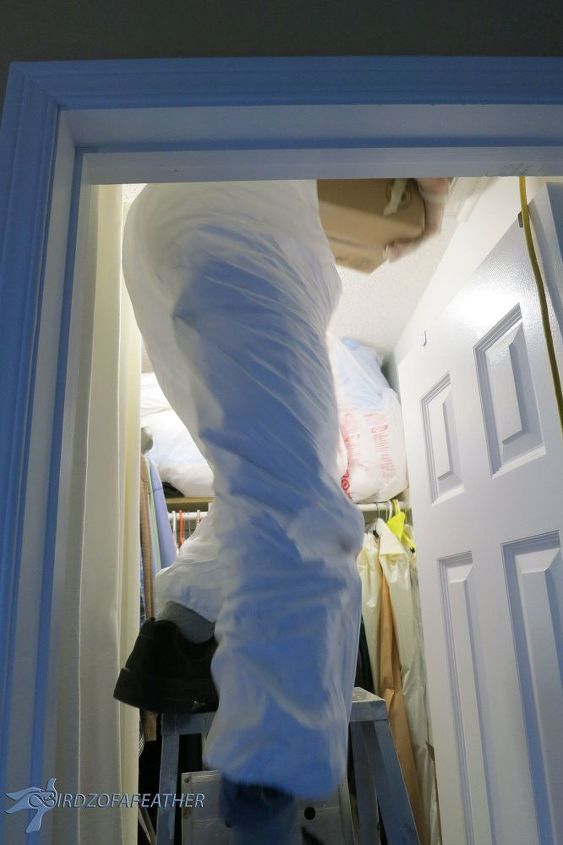
Hubs cut the power to the bathroom so he could connect the wiring safely without risk of electrocution! He suited up in a white Tyvek coverall, like the one pictured below, so he could protect himself and his clothes from the scratchy insulation. He also wore a mask just in case of mice, which almost always reside in the attic. You need to take the precaution of wearing a mask so you don't breathe in any toxins.

Tyvek Coverall; source: Home Depot
Hubs placed a ladder beneath our attic access (ours is in the bedroom closet) and took all his equipment up with him in a box to keep it all together. This included a drill, screws, screw driver, tin snips, duct fittings, fan, electrical bushing, silver tuck tape, cord etc. He also took a bright light on an extension cord up with him so he could see (the light was run to another electrical power supply that was still working).
Hubs has previously done work in the attic so he had already placed some runner strips of plywood across the joists so he could walk. You'll want to rip down some plywood for this purpose if you don't already have some in the attic. Once in the attic, he pushed aside all the blown in insulation so he could locate the electrical wiring and hole in the ceiling of our bathroom.
The new fan body was positioned over the hole in the ceiling and then screwed into the joists. A metal strip (shown below) was attached to the back to help secure it further to the joist (they can reduce side to side vibration). Depending on where your hole is positioned between the joists, you may have to install anywhere from one to 4 of these strips.
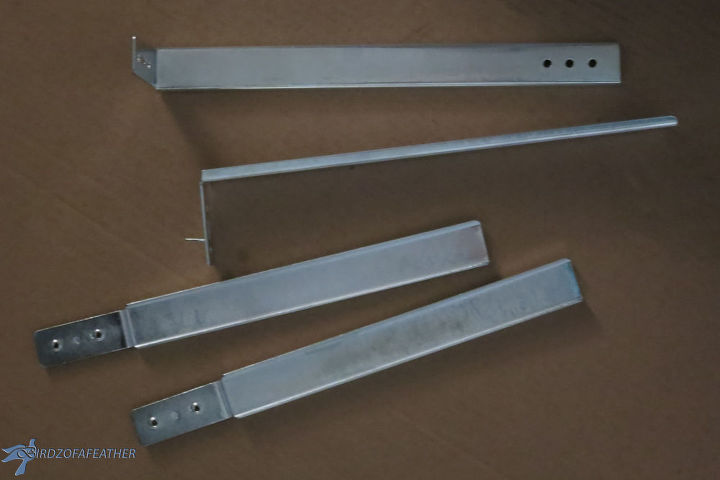
Our fan was positioned beside the joist so we only needed one new strip at the back. He installed the electrical bushing onto the fan (it protects the wire) and then fed the wire through and connected it.
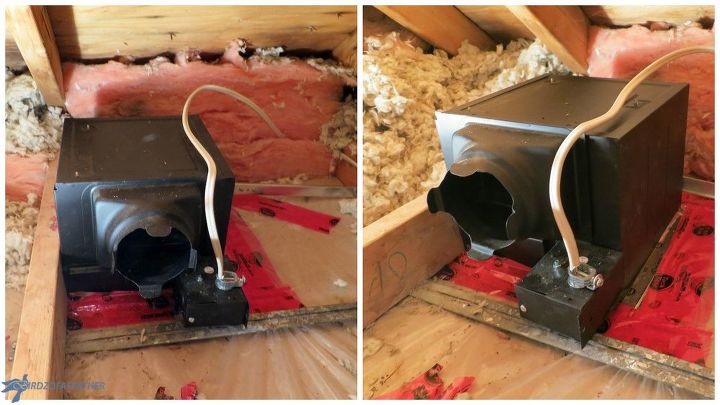
Hubs used tuck tape to seal along the edges of the fan, then he then started dry fitting metal ducting, starting with the reducer, until he eventually got it all to line up with the roof vent.
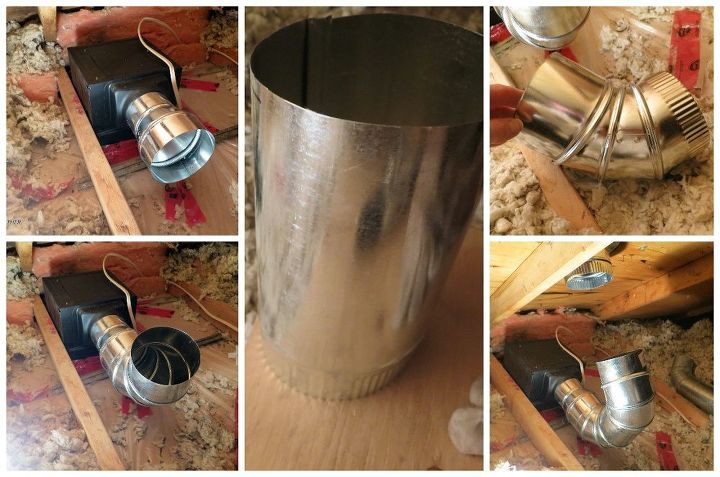
As you can see below, one of the pieces of ducting is articulated so it can be twisted into just about any position to line the ductwork up with the roof vent.
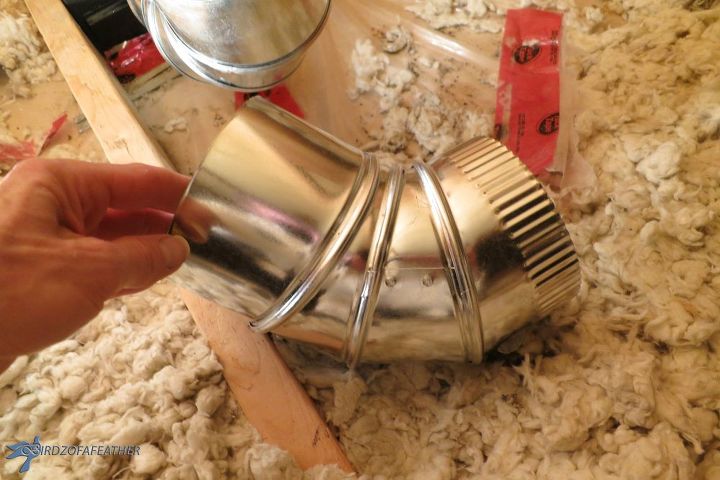
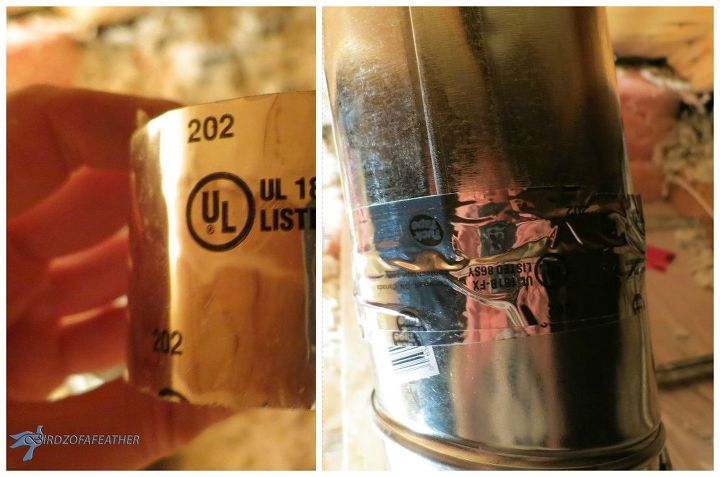
Hubs used a 5" gasket with a seal around it for the connection to the roof vent. This is a much better solution than the straight run with release cuts the builder previously installed because it seals any gaps. He had to use tin snips fit the gasket flush against the joist in order to line it up with the roof vent. Once it fit, he peeled the tape off the gasket and pressed it up onto the underside of the roof. He pre-drilled and inserted screws all around the gasket.
When all the ductwork was connected he pre-drilled a hole into each duct joint and installed at least one if not two 8 x 1/2"screws to hold the sections into position.
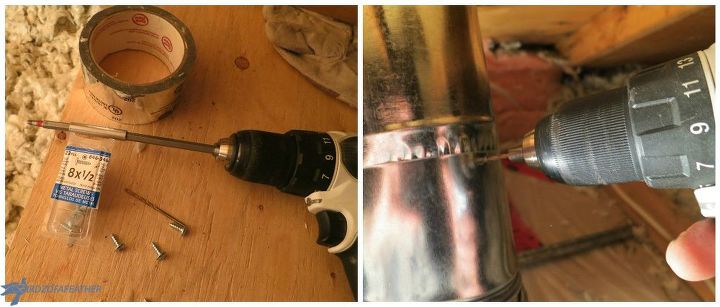
Then he wrapped each joint with the silver tuck tape to seal it.
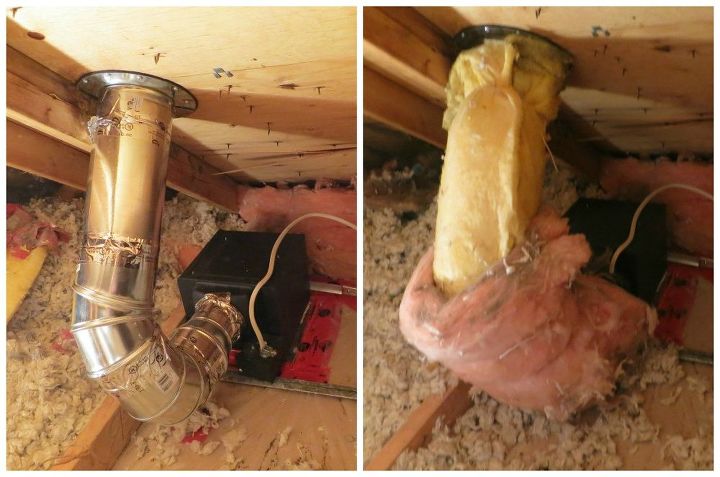
Before he finished up, hubs turned the power back on to make sure everything was running smoothly. Then he turned the power back off (as a precaution) and went back into the attic to wrap the pipe with insulation and tie it on with cord (he reused the old insulation that was originally there). He also returned all the blown in insulation to its original position between the joists.
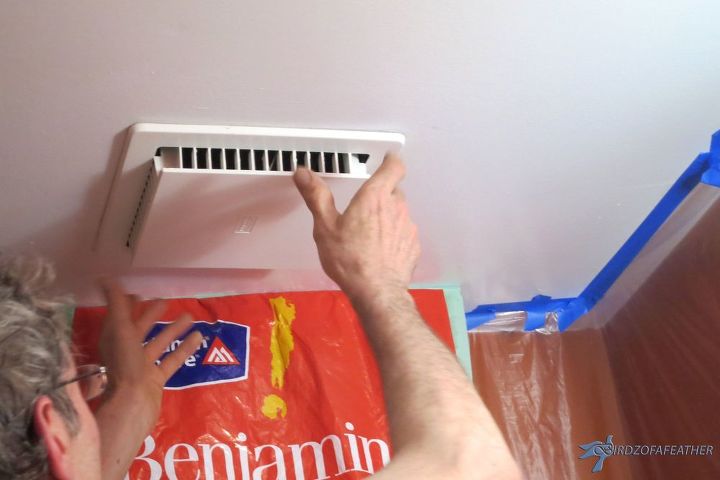
He brought all his tools back down and then put the ceiling cover over the fan to finish it off. Now the fan purrs like a kitten; bring on the rubber ducky! For more bathroom renos, check out the following posts: Reclaiming and Maximizing Space in the Bathroom

Powder Room Makeover – Champagne Taste on a Beer Budget In the next few weeks, I'll have a reveal of a bathroom we just completed for my Mom!
For more inspiring ideas, in and around the home, follow our blog here on Hometalk and/ or Birdz of a Feather (link below this post where you see our logo). You can also follow us on:
Pinterest: http://bit.ly/BirdzPIN
Facebook: http://bit.ly/BirdzFB
YouTube: http://bit.ly/BirdzYT
Instagram: http://bit.ly/BirdzIG

Want more details about this and other DIY projects? Check out my blog post!
Comments
Join the conversation
3 of 12 comments
-
Great article.
-
I'm now forced to hire all specialists. My honey passed on three years ago....And it sure does get expensive....So a lot of projects are put on hold.


Frequently asked questions
Have a question about this project?