First Upholstery Project Using HOT GLUE GUN!

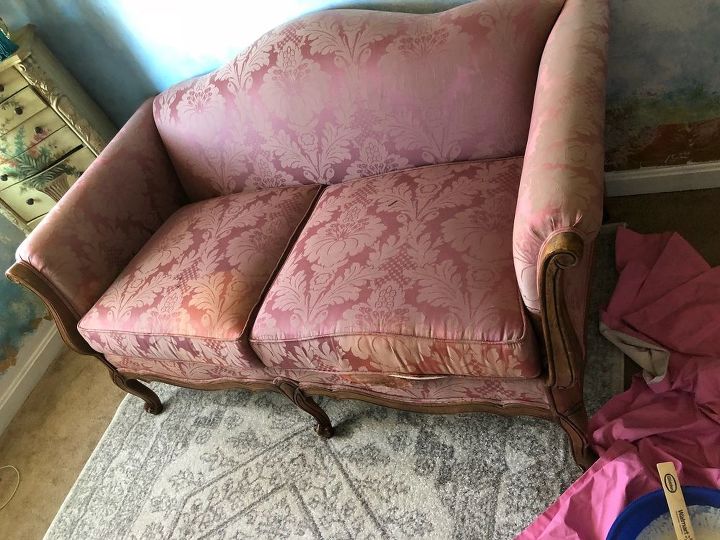
Hello all, I hope your new year is starting well! This project is one that I have mulled over for quite some time, and finally decided to tackle it since I have moved this piece into the addition in my living room. It is a small loveseat that I purchased at a Goodwill for $25 bucks about 2 years ago...its been in my hiding in my boudoir, but now its ready to be revealed!!! 
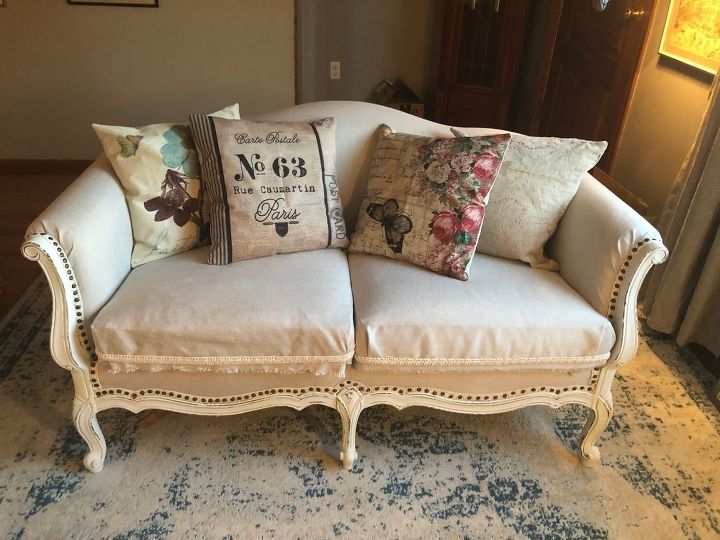
And you'll never believe I didn't sew a single stitch! Its all done with a low temp upholstery grade hot glue commonly used for holding upholstery gimp and my stapler...here's what I did..
As a side note, I did attempt to paint this sofa when I first got it, but I abandoned that fairly quickly because I didn't like that the pattern on the jacquard fabric could still be seen... I also didn't want to remove the fabric which was in perfect shape... So I decided to glue new fabric right on top of the old !
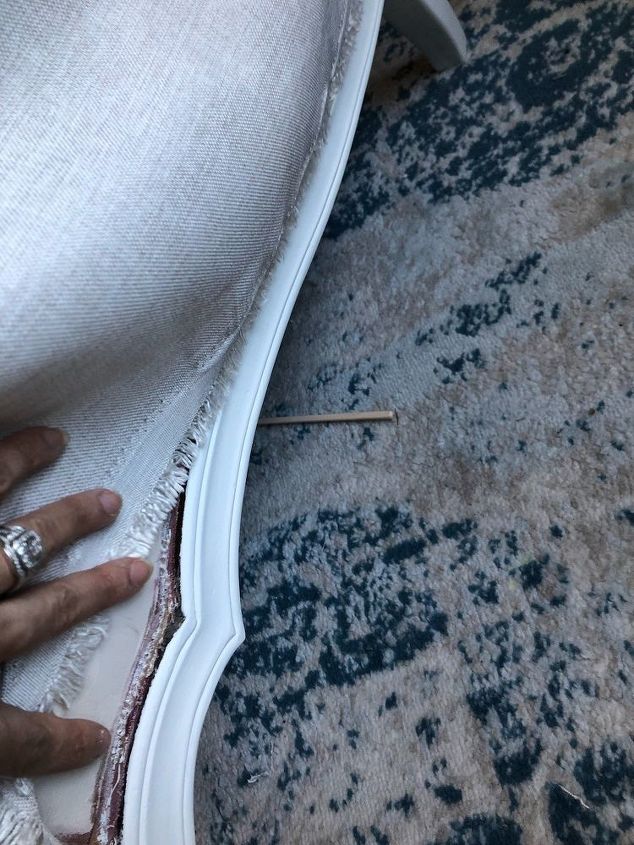
The only thing I did remove was the gimp that separated the upholstery and the wood frame... it pulled away easily and left a gap about 1/2 inch for me to work with..
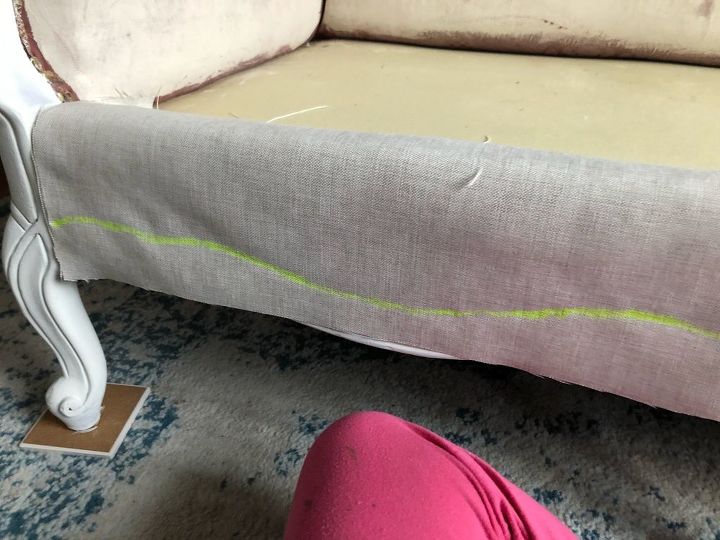
Since I was pretty much winging it, I decided to start at the bottom and "trace" out the curves at the bottom of the sofa.. (I knew this section would be covered with the gimp, so wasn't concerned with the yellow). Then I simply cut the fabric along this yellow edge..
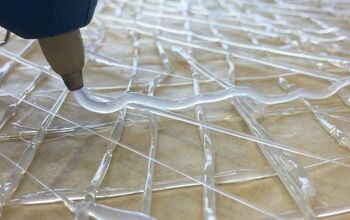
and hot glued this edge along the bottom.. slowly gluing and placing, gluing and placing ( I used a stick to avoid burning my fingers). If you work slowly and carefully you can get a very nice neat edge !
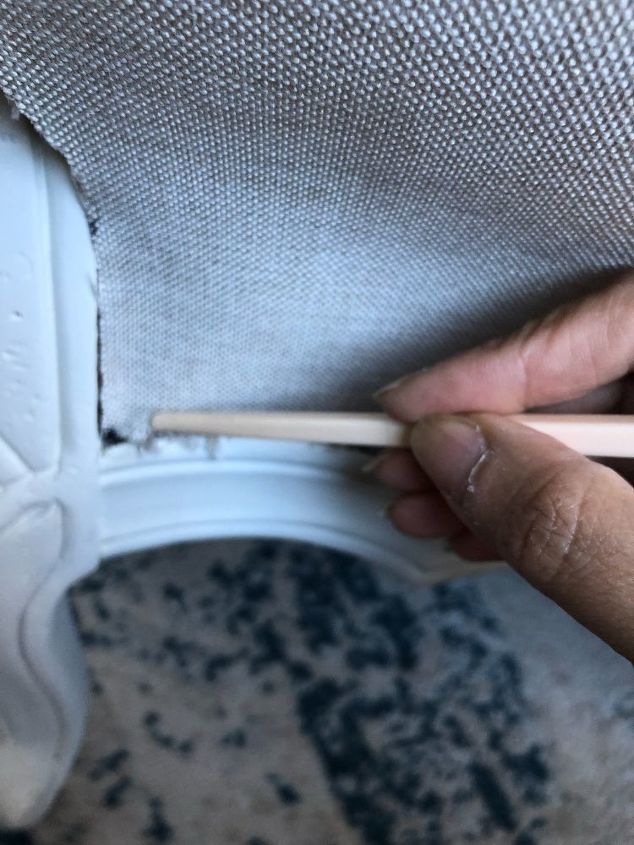
This is my special stick tool also know as a chopstick...
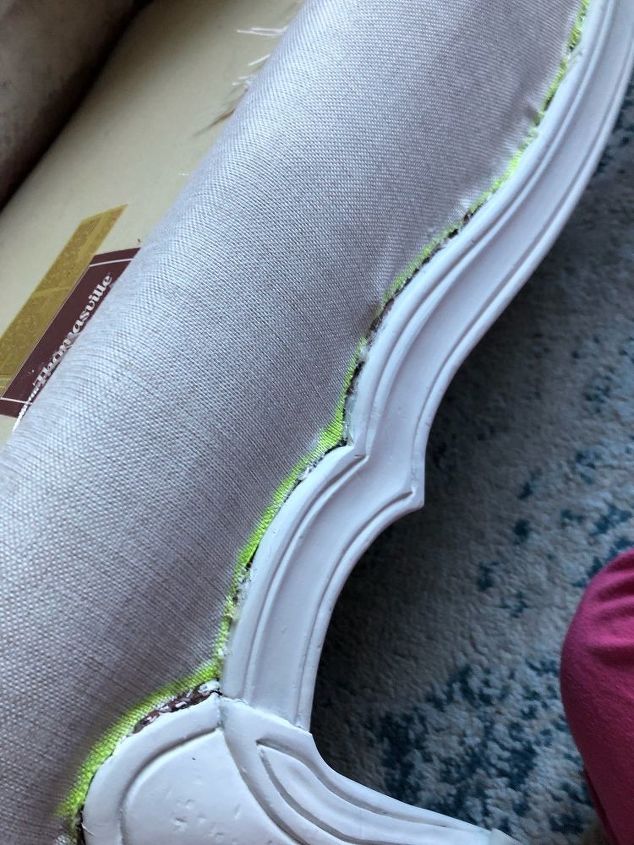
Once this entire front section was glued.. I then.. pulled the free section up tight and around the front curve against this edge pictured.. and hot glue it across and down... Tip: when using hot glue with a thick upholstery fabric mash the glue bead down smoothly and it won't bleed through)
I followed this method for each section separately.. the left and ride side.. the back rest and lastly the entire back section...
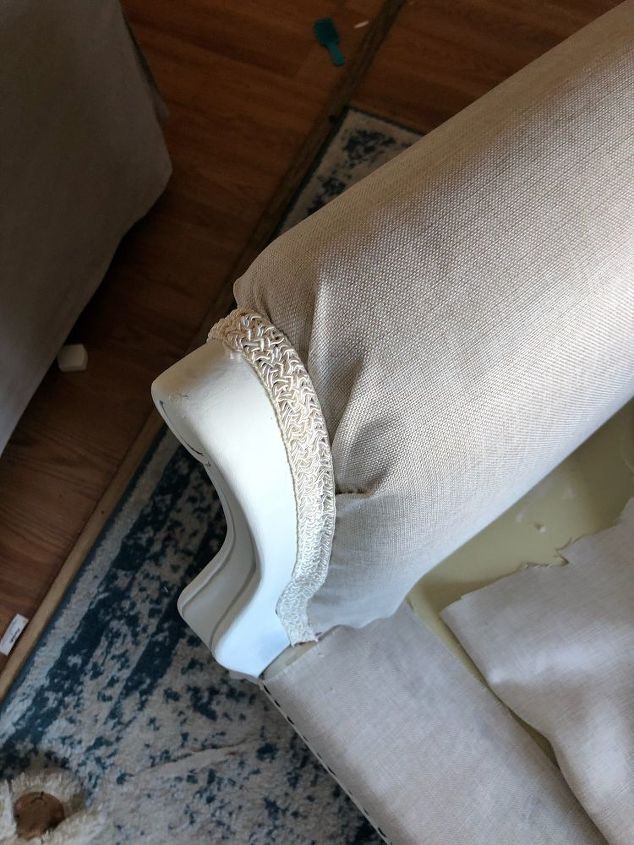
The sides will have little pleats as you round the rolled arms.. They will actually form pretty naturally and if you shape them with your fingers before you glue them, they will be nice and even. Again, I started at the bottom of the outside of the arm, brought it around and both tucked and glued it in.
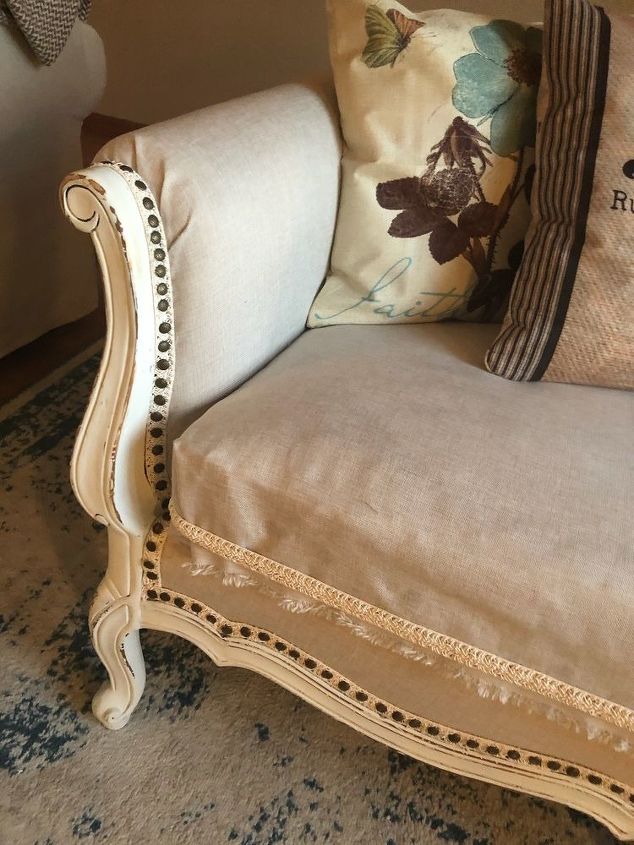
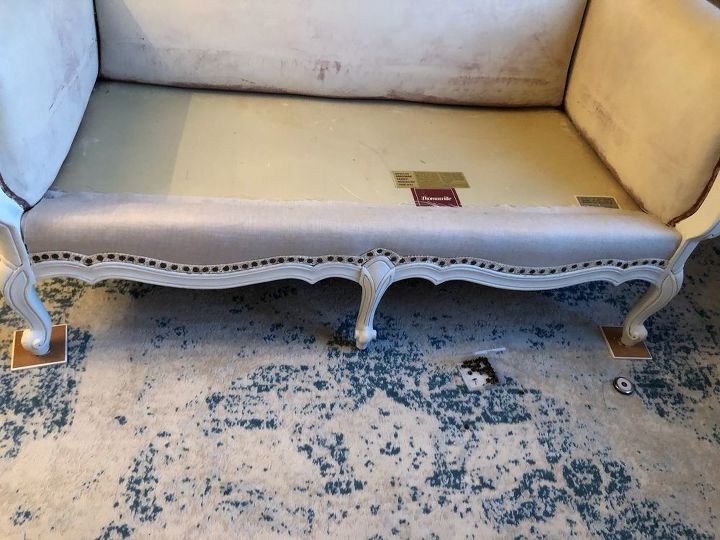
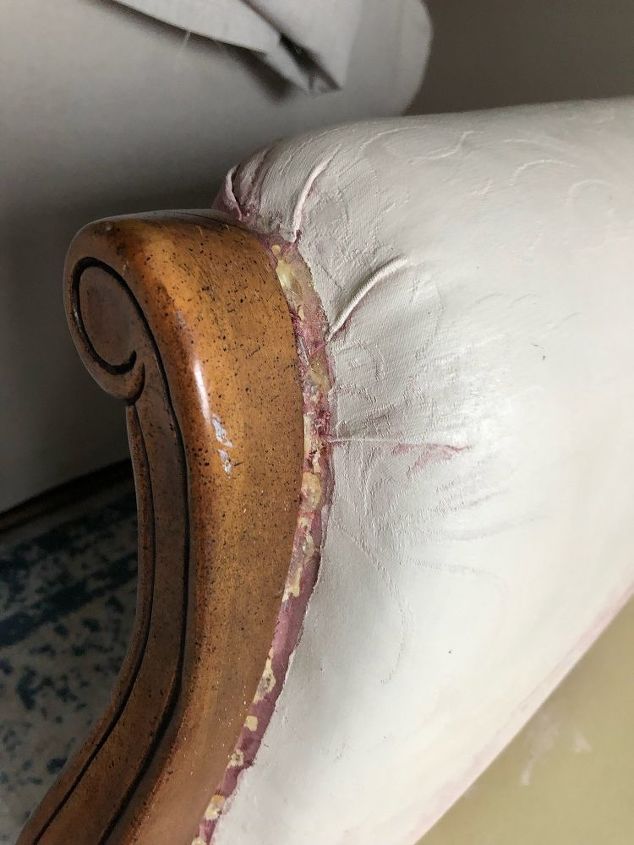
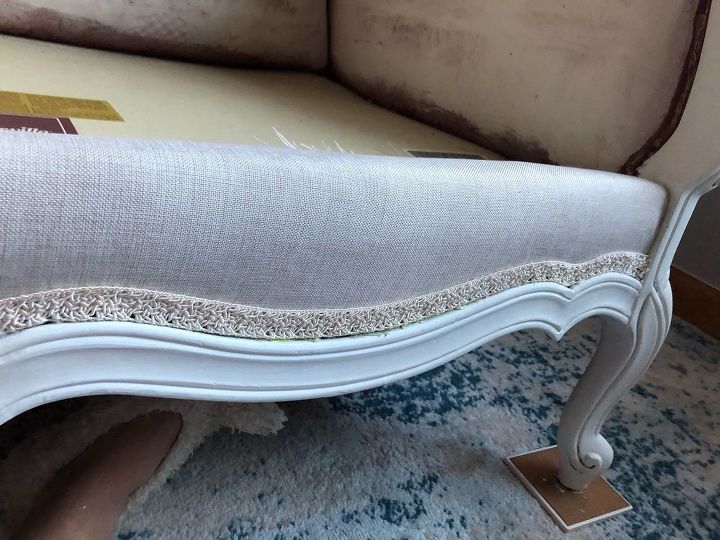
After each section was done, I then went back and glued on the gimp on top to hide the edges... and put these decorative nail heads about an inch apart...I did also paint the frame in a cream colored chalk paint and lightly distressed it ( not pictured, I did this BEFORE upholstering  ) I also decided to wrap the seat cushions the same way you would wrap a square box and glued each section... I ended up with this frayed section
  in the front, but decided to highlight this little boo-boo by putting the gimp right above it and I think it came out cute!
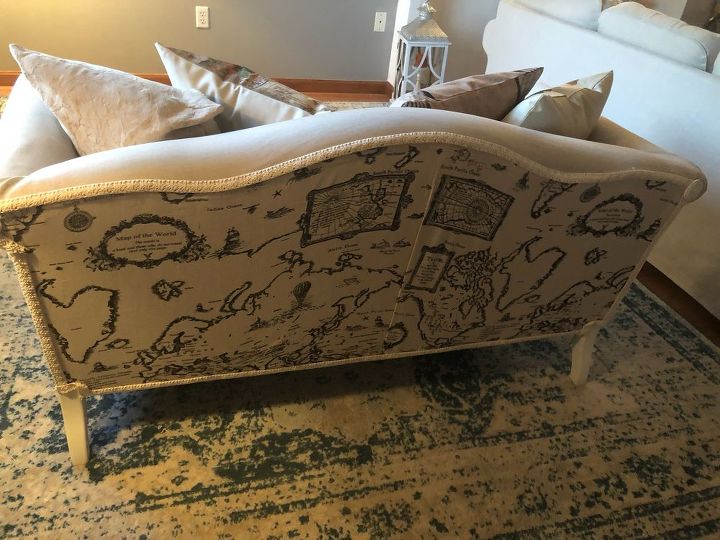
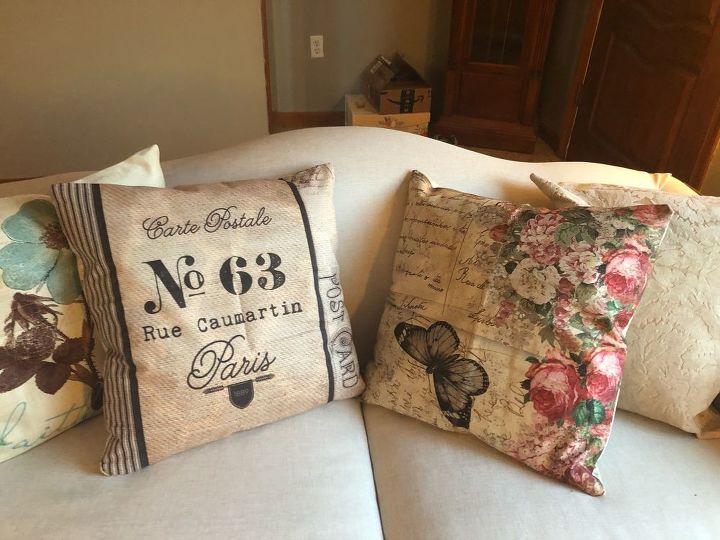
I knew the back of the sofa would be visible and wanted something a little bit more flashier... so I found this canvas table cloth with a wonderful print! It was the exact width I needed and followed the same method to put this on top of the fabric...
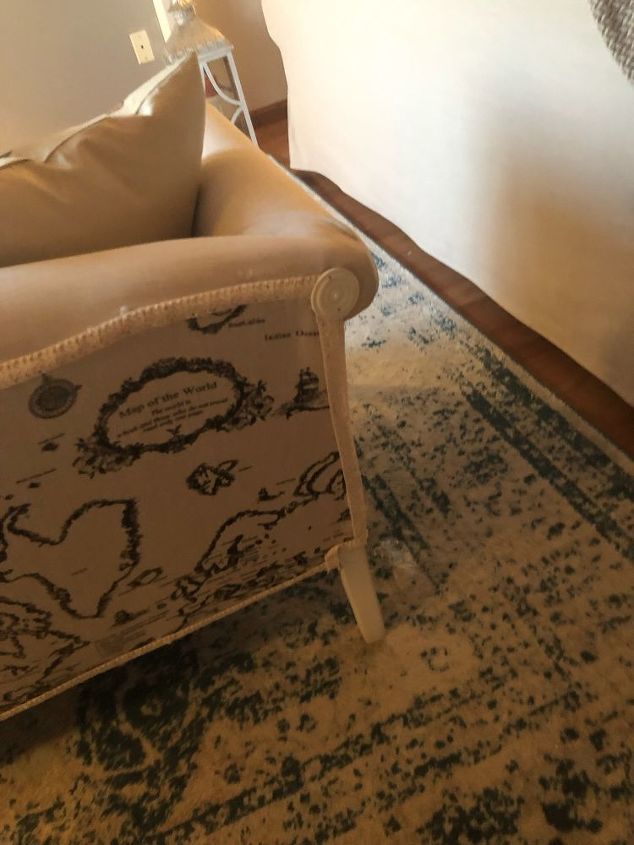
Since I had no idea how to cover these little rounded corners.. I simply purchased two wood rosettes about 2/5 in diameter... painted and hot glued (and nailed) them to the frame to cover the transitioned area..
I did make some mistakes that I also learned from and this project was very rewarding... It did take me about 2 weeks ( I tried to take my time as much as possible). I also want to mention that in the process I did attempt to remove sections to test the adhesion of the glue... it was nearly impossible to remove! This sofa is largely done with the hot glue ( I only used staples on the back bottom edge) and I am very confident in the bond. It doesn't move, or wrinkle and I am in LOVE  . Please feel free to hit me up with any questions and I'll do my best to answer them ! Now on to my next project ...
Resources for this project:
See all materials


Comments
Join the conversation
-
Abso-tively, posi-lutely FABULOUS!!! You scored a huge win by finding this lovely piece in such good condition, but your carefully explained photographs, processes, and tips make this daunting project inspire me to attempt similar results. Yours is a total success!
-
Good job. Had you used a softer fabric, it might even looked a little better.


Frequently asked questions
Have a question about this project?
Definitely looks more contemporary than before. But my question is what was wrong with the original fabric--I personally liked the print and color.
LOVE THIS.
I have been hanging on to my 1980's camelback sofa sleeper because you can't find that shape in new sofas. I hide the rips with slipcovers but wanted to reupholster it with dropcloths. This might make that so much easier.
So how many glue sticks did it take LOL? I seem to go through tons with just my school and craft stuff.
It looks fantastic. Did you glue the cushion cover portion as well? Did you have to buy new stuffing for the cushions? You should be proud.